When coating concrete floors with epoxy, repairing cracks is a must. Skipping this step can lead to peeling, bubbling, and early coating failure, as cracks allow moisture to seep in and weaken the bond. Here’s why this matters and how to do it right:
- Untreated cracks cause 80% of coating failures.
- Cracks disrupt adhesion, causing uneven finishes and reducing durability.
- Proper repair ensures a smooth, long-lasting surface.
Steps to fix cracks before coating:
- Inspect and clean the floor: Identify crack size, depth, and moisture levels.
- Choose repair materials: Use epoxy fillers for strength or polyurethane for flexibility.
- Fill and smooth cracks: Ensure repairs are flush with the surface.
- Prepare for coating: Grind and etch the surface for proper adhesion.
For best results, consider hiring professionals like Restore Custom Coatings, who ensure durable, polished finishes with expert preparation and application.
Got Cracks? How to repair cracks prior to epoxy floor installation
Why You Must Repair Cracks Before Coating
Skipping crack repairs before coating concrete floors can end up being a costly mistake. Cracks left untreated can compromise the effectiveness and longevity of your coating, turning your investment into a short-lived solution.
Experts agree that damaged concrete poses a serious threat to coating performance:
"Damaged concrete can significantly affect the outcome of the coating. Uneven surfaces, cracks, and erosion not only look bad but can cause the coating to wear out faster and fail to bond properly." – FloorTech Concrete Coatings
Epoxy coatings are designed to bond to solid, intact concrete. Cracks disrupt this process, creating gaps that let moisture seep in and weaken the bond. Over time, this can lead to a chain reaction of issues that shorten the lifespan of your floor.
How Cracks Impact Coating Durability
Cracks in concrete don’t just create weak points – they can compromise the entire coating system. Moisture infiltration is one of the biggest culprits. Cracks allow water and humidity to get trapped beneath the epoxy coating, which can cause bubbling, peeling, and delamination. Once moisture finds its way in, it spreads quickly, damaging larger sections of your floor.
Larger cracks present an even bigger challenge. Epoxy coatings alone can’t bridge wide gaps effectively. Without proper filling, these areas create weak bonds that lead to early failures. Even seemingly minor hairline cracks can cause trouble. These tiny flaws allow the coating to settle unevenly, creating stress points that eventually result in peeling or cracking. What starts as a small, barely noticeable issue can escalate into significant damage over time.
Appearance and Functional Issues
Cracks that go unaddressed also ruin the polished, professional look you’re aiming for. Epoxy applied over cracks settles unevenly, leaving behind an uneven and unappealing finish.
Functionally, cracked areas act as weak spots where the coating is more likely to chip, peel, or wear down faster than the rest of the surface. These underlying issues persist, with temperature changes, moisture, and natural settling continuing to affect the concrete. If cracks aren’t properly repaired, these forces can transfer directly to the coating, reducing its durability.
Repairing cracks before applying a coating doesn’t just improve the floor’s appearance – it ensures a stronger, longer-lasting bond. A properly prepared surface minimizes the risk of future peeling or cracking, giving you a durable and polished result. The next step is to assess the size and condition of the cracks to determine the best repair method.
How to Check Crack Size and Floor Condition
Take a closer look at your concrete floor to assess the size, depth, and extent of cracks or damage. This step will help you decide whether you can handle repairs on your own or if it’s time to call in a professional.
Steps to Inspect Cracks and Damage
Start by giving the surface a thorough cleaning. Use a wire brush or compressed air to clear away debris and expose the full extent of the damage. What might initially seem like a minor hairline crack could turn out to be more significant once cleaned.
Measure the crack width using a ruler or a crack gauge. If you find cracks wider than 1/8 inch, you could be dealing with potential structural issues. For depth, insert a small tool like a putty knife into the crack. Mark any cracks that go all the way through the slab for closer inspection.
Look beyond the cracks for other signs of structural damage. Issues like delamination, honeycombing, or cold joints can point to more serious problems. Use a straight edge to check if the slab is level – sunken or uneven areas often signal structural concerns.
Be on the lookout for severe damage that may require professional intervention. If the concrete is breaking apart into pieces, it’s often a sign that a full replacement is necessary. Widespread cracking across the entire slab or noticeable heaving – where sections of the concrete shift significantly – are also strong indicators of deeper structural trouble.
Document everything by taking photos and notes. Once you’ve gathered details about the cracks and structural issues, move on to evaluating moisture levels and surface contaminants.
Testing for Moisture and Dirt
Moisture is a critical factor to address because trapped water can ruin a concrete coating job. A simple way to test for moisture is the plastic sheet method. Tape a 2-foot by 2-foot clear plastic sheet to the concrete, sealing all edges. Leave it in place for 24 hours, then check underneath. If you find condensation or dark spots on the concrete, moisture is present and must be dealt with before applying any coating.
Test multiple spots, focusing on areas near walls, drains, or basements, to get a clear picture of moisture levels.
Next, check for oil stains or chemical contamination. Discolored patches on the concrete might indicate the presence of oil or grease. Pour water on these spots – if it beads up, contamination is likely.
Evaluate the surface porosity by sprinkling water droplets in different areas. Properly prepared concrete will absorb the water within a few minutes. If the water sits on the surface, the concrete may be too dense or contaminated, which can interfere with coating adhesion.
Look for efflorescence, the white, chalky residue that forms when water moves through the concrete and deposits minerals on the surface. This issue must be addressed before applying a new coating, as it signals underlying moisture problems.
Lastly, check for remnants of old coatings that could affect adhesion. Lightly scratch the surface with a screwdriver – if material flakes off or if you notice multiple layers, additional preparation will be needed.
Perform these inspections when temperatures are between 50°F and 85°F to ensure accuracy in crack appearance and moisture behavior. Keep detailed records of your findings to guide you in selecting the right repair materials and methods for the next steps.
Selecting Repair Materials and Tools
When tackling concrete crack repairs, it’s essential to choose materials and tools that align with the specific needs of the project. The selection process should consider factors like crack size, expected traffic levels, and surrounding conditions to ensure a durable and effective repair.
Types of Repair Products
Different products are suited for different types of cracks and uses:
- Epoxy fillers are perfect for structural cracks that require maximum strength. These two-part systems harden into a rigid material, often stronger than the original concrete. Semi-rigid epoxy systems are especially effective in areas exposed to heavy traffic and industrial equipment.
- Polyurethane crack fillers are known for their flexibility and quick curing times. For example, RadonSeal‘s CrackWeld DIY Concrete Crack Repair Kit uses a self-leveling polyurethane that hardens into a strong polymer ready for use in under an hour.
- Concrete patching compounds are ideal for larger repairs, especially where chunks of concrete are missing. Vinyl concrete patchers work well for depths from ¼ inch to 2 inches, eliminating the need for additional bonding agents in narrow cracks. For deeper or more urgent repairs, Rapid Set Cement All provides a fast-setting, high-strength solution.
- Quick-setting cement products, like Sakrete‘s Fast-Setting Cement Patcher, allow foot traffic within 4 hours and achieve a final strength of 5,000 PSI.
Once you’ve chosen the right repair materials, having the proper tools is equally important for a successful application.
Tools Needed for Crack Repair
To ensure lasting results, preparation and application tools play a crucial role:
- Surface preparation tools are essential for cleaning and prepping the area. Use a wire brush, shop vacuum, and compressed air to remove debris. For coated surfaces, a paint scraper can strip old layers down to bare concrete.
- Crack treatment equipment includes tools like diamond crack chasers or angle grinders. These tools help open and profile narrow cracks, improving material penetration and bonding.
- Application tools vary based on the repair product. Caulking guns work well for cartridge-based fillers, while dual-component systems might need manual or pneumatic injection guns. Trowels are handy for smoothing out repairs to ensure an even surface.
- Safety equipment is a must. Protective eyewear, chemical-resistant gloves, and dust masks keep you safe during both preparation and repair.
- Finishing tools, such as grinders, help smooth out repairs and ensure they are flush with the surrounding concrete. A straight edge can confirm the surface is level.
By matching the right tools to your chosen materials, you can ensure a seamless and effective repair.
Matching Materials to Crack Size and Traffic
Choosing the right material depends on the crack dimensions and the type of traffic the area will experience:
- For narrow cracks up to ¼ inch deep and ½ inch wide, low-viscosity fillers like Sakrete’s Concrete Crack Filler are ideal. These products flow easily into tight spaces and can handle foot traffic within 24 hours.
- For wide cracks or structural damage, semi-rigid polyurea products like Spal-Pro RS 88 are excellent. They protect joint edges from spalling under heavy wheeled traffic and cure quickly, minimizing downtime.
- In high-traffic industrial areas, durability is key. Metzger/McGuire emphasizes the risks of neglecting even minor cracks in busy environments:
"What starts as a minor crack in your industrial facility can lead to a more serious or potentially hazardous situation, especially in areas that are heavily trafficked with either pedestrian traffic or material handling vehicles such as pallet jacks and forklifts".
For such demanding conditions, industrial-grade epoxy mortar patches, self-leveling epoxy resurfacers, and semi-rigid joint fillers are highly recommended.
- For residential and light commercial areas, general concrete crack fillers in cartridges are a cost-effective choice for foot traffic zones. Vinyl concrete patchers are also a reliable option for wider repairs.
When selecting materials, consider their PSI rating and cure time to match your traffic needs. As ArmorPoxy explains:
"Our floor repair products are engineered to withstand heavy foot traffic, impact, and abrasion, ensuring long-term durability. Whether it’s a residential garage, commercial warehouse, or industrial facility, ArmorPoxy products can handle the toughest environments".
Generally, higher PSI ratings and faster cure times indicate materials designed for heavy-duty use.
sbb-itb-13ef811
Step-by-Step Crack Repair Process
With your tools and materials ready, it’s time to dive into the repair process. A systematic approach is key to ensuring that your repairs bond effectively and provide a smooth base for your coating application.
Cleaning and Preparing the Surface
A clean surface is essential for proper adhesion. Skipping this step can lead to peeling, bubbling, or uneven finishes that undermine the entire project.
Start by removing loose dirt, dust, and debris from the concrete surface. Sweep thoroughly, focusing on cracks where debris tends to collect. Use a HEPA-filtered vacuum to grab fine particles that might otherwise go unnoticed.
Next, use a concrete cleaner and degreaser as directed by the manufacturer. Oil, grease, and other contaminants can prevent the repair material from sticking properly. Scrub the surface with a stiff brush, and for tougher stains, use a heavy-duty concrete cleaner or solvent.
Rinse the area thoroughly to ensure no cleaning residue remains, as leftover chemicals can interfere with bonding. Let the surface dry completely before moving forward – moisture trapped in the cracks can cause adhesion issues.
Once the surface is clean and dry, you’re ready to fill the cracks.
Filling Cracks and Smoothing Repairs
If you’re using cartridge-based fillers, cut the tip at a 45-degree angle to match the crack’s width. Apply steady pressure to the caulking gun as you move along the crack, slightly overfilling it. Then, smooth the filler with a putty knife or trowel for a flush finish.
For two-part epoxy systems, mix only the amount you can work with within the product’s specified time frame. These materials have a limited pot life, so be efficient once you start mixing. Pour or inject the epoxy into the crack, ensuring it fills all the way to the bottom.
For wider cracks or larger gaps, pre-fill the space with clean, dry sand before applying the repair material. This technique reduces the amount of filler needed and helps maintain the repair’s structural integrity.
After filling, use a straight edge to ensure the repaired areas are level with the surrounding concrete. High spots will show through coatings, while low spots can weaken the surface or create visible imperfections. Taking the time to smooth and align repairs now will save you headaches later.
Once the cracks are filled and smoothed, it’s time to focus on curing.
Allowing Proper Curing Time
Curing is critical for ensuring the durability of your repairs and the success of your coating application.
Modern crack repair products are designed to cure quickly without compromising quality. For example, JOINT-GUARD™ RS, a fast-setting joint and crack sealant, becomes traffic-ready just one hour after application. This quick turnaround minimizes downtime and lets you move to the next step faster.
Similarly, Multicoat’s 2-Part Urethane "Speed Bond" crack repair caulking fully cures within an hour at 77°F. Once cured, the area is ready for overlays, decorative finishes, or other next steps.
Keep in mind that environmental factors like temperature can impact curing times. Cooler temperatures may slow the process, while warmer conditions can speed it up. Always check the manufacturer’s instructions for the specific product you’re using, as curing times vary widely.
During curing, protect the repaired area from foot traffic, debris, and moisture. Even fast-curing products need uninterrupted time to reach full strength. Before applying any coatings, test the repair by lightly pressing it with your fingertip – it should feel firm with no indentation. This ensures the repair is ready for the next phase and guarantees long-term adhesion.
Final Steps Before Applying Epoxy
Your crack repairs are done and cured, but there’s one more crucial step: preparing the surface. These last touches will make all the difference in how well the epoxy adheres.
Grinding and Etching the Surface
Repaired cracks can leave uneven textures that might interfere with epoxy bonding. Grinding smooths out these areas and creates the rough texture – known as a "scratch or tooth" – that epoxy needs to grip securely.
Start by grinding down any repaired spots that are higher than the surrounding concrete. A handheld angle grinder with a 7-inch diamond cup wheel works great for small areas. For larger spaces, consider renting a commercial walk-behind floor grinder.
The goal here isn’t just to make the surface smooth but to create a texture similar to 80–180 grit sandpaper. Without this roughness, even the best epoxy will struggle to stick properly.
Don’t forget safety gear. You’ll need gloves, goggles, and a dust mask. Use a dust shroud attached to a shop vacuum to keep the area clean. Concrete dust can clog filters quickly, so have spares ready, and clean or replace them as needed.
Once grinding is done, vacuum the floor thoroughly. A quick way to check if the surface is clean? Run your fingers across it – your fingers shouldn’t come away white with dust. For extra assurance, wipe the surface with denatured alcohol or acetone using a microfiber pad.
Next comes etching, which adds even more texture for better adhesion. Skip muriatic acid and opt for a concrete cleaner, degreaser, and etcher specifically designed for this purpose.
Follow the product’s instructions carefully. Wear gloves and goggles, apply the solution evenly, and rinse thoroughly. The floor must dry completely before applying epoxy – this can take 24 to 72 hours, depending on the temperature and humidity.
Checking Surface Readiness
After grinding and etching, a few final checks will ensure your surface is ready for epoxy.
First, press on each repair. If it feels solid and leaves no indentations, it’s good to go. Sand down any repairs that stick out above the concrete to create a seamless surface.
"Once applied, repairs need to be cured fully and sanded down to create a level, seamless surface that is ready for coating." – Xtreme Polishing Systems
Next, check for moisture. High moisture can cause bubbles, peeling, or delamination once the epoxy cures. Use a moisture meter to confirm the floor is dry enough.
Verify the surface profile. The concrete should have a Concrete Surface Profile (CSP) of 2 to 3 – this means it’s rough enough for strong adhesion but not so textured that it creates visible peaks under the epoxy. Make sure the texture is uniform across the entire surface.
Temperature matters, too. The floor temperature should be between 60°F and 90°F for the epoxy to apply and cure properly. Use an infrared thermometer to measure the floor’s surface temperature, not just the air temperature.
Finally, vacuum and wipe down the floor one last time to remove any dust or residue. The surface should be completely clean, dry, and free of oil, grease, or any other contaminants that could interfere with the epoxy bond.
With these final checks, you’ll have a smooth, dry, and textured surface that’s ready for epoxy.
Why Choose Restore Custom Coatings for Your Flooring Needs

While you might be able to tackle minor crack repairs on your own, achieving a flawless epoxy finish calls for professional expertise. That’s where Restore Custom Coatings comes in. Their skilled team ensures your floors not only look impeccable but also stand the test of time. By combining thorough preparation with expert application, they help maintain your floor’s durability and visual appeal.
Professional Epoxy Flooring Services
Restore Custom Coatings provides a variety of flooring solutions that enhance both the durability and aesthetics of your floors. Their services include epoxy flake systems, metallic finishes, concrete sealing, and polished concrete floors.
- Epoxy Flake Systems: These floors balance strength with style, making them ideal for spaces like garages, basements, and commercial areas. They’re built to endure heavy use while maintaining their polished appearance.
- Metallic Finishes: If you’re looking for a unique and eye-catching finish, their metallic systems offer depth and texture that can be tailored to your personal taste.
- Concrete Sealing: Protect and enhance your existing surfaces with their concrete sealing services. Whether it’s shielding a driveway from weather and stains or adding a durable layer to an interior floor, sealing extends the life of your concrete.
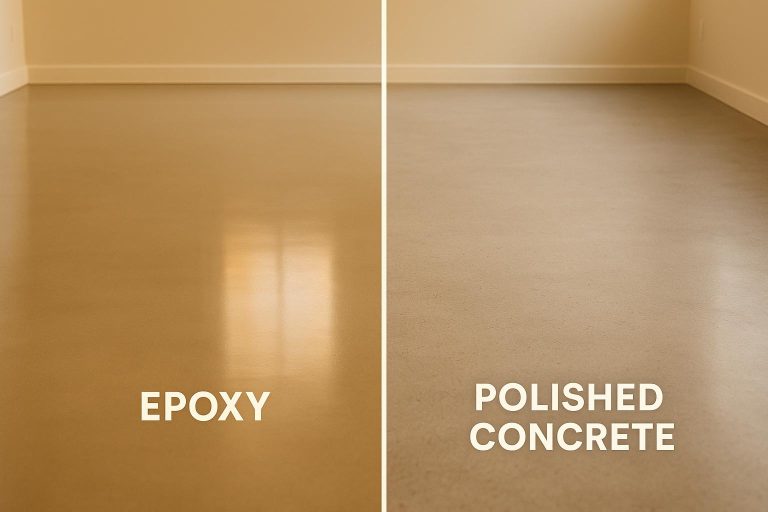
- Polished Concrete Floors: These versatile, low-maintenance floors resist stains and offer a range of options for customizing color and texture. They’re a sleek choice for modern homes and commercial settings alike.
Benefits of Working with Restore Custom Coatings
Restore Custom Coatings doesn’t just deliver beautiful floors – they ensure long-lasting performance through precise repairs and careful preparation.
One major advantage is their one-day installation process. While proper crack repairs and surface prep may require some time, the actual coating application is completed quickly, minimizing any inconvenience to your routine.
They also provide a lifetime written warranty on all projects. Covering both materials and workmanship, this warranty protects your investment and gives you peace of mind, knowing you won’t face unexpected repair costs.
Another standout feature is their customizable designs. With a wide array of colors, patterns, and finishes, you can create a floor that perfectly suits your style, whether you’re aiming for something subtle and professional or bold and striking.
Finally, their stain-resistant finishes make maintenance a breeze. Spills clean up effortlessly, and regular upkeep keeps your floors looking fresh – a particularly useful feature for high-traffic areas like kitchens, workshops, or commercial spaces.
With these advantages, Restore Custom Coatings delivers flooring solutions that combine practicality and elegance, ensuring your floors remain durable and visually appealing for years to come.
Conclusion: Getting Long-Lasting Coated Floors
Fixing cracks in concrete floors isn’t just a box to check – it’s the foundation of any successful flooring project. Ignoring this step can lead to peeling coatings, unattractive blemishes, and expensive fixes down the road. Taking the time to assess cracks, choose the right repair materials, and carry out the repairs with care ensures a floor that’s built to last.
Beyond crack repairs, proper surface preparation is just as critical. This includes thorough cleaning, selecting the right materials, and allowing for effective curing. These steps create the ideal surface profile, enabling your epoxy coating to bond deeply with the concrete. The result? A seamless and durable finish that won’t peel or chip easily.
For small cracks, DIY solutions might work. But if you’re dealing with significant damage or aiming for a professional-grade finish, it’s worth turning to experts. Companies like Restore Custom Coatings provide specialized repair and coating services, complete with a lifetime written warranty, giving you peace of mind and protecting your investment.
Your concrete floor isn’t just a surface – it’s a vital part of your property’s function and appearance. By addressing cracks properly before applying a coating, you’re ensuring a floor that looks great and performs well for years to come.
FAQs
Why is it important to repair cracks in a concrete floor before applying an epoxy coating?
Neglecting to fix cracks before applying an epoxy coating can create a host of problems. For starters, cracks can interfere with the coating’s ability to adhere properly, leading to peeling, bubbling, or an uneven surface. On top of that, cracks left untreated can grow over time, weakening the structure and ruining the look of the coated area. By repairing cracks ahead of time, you set the stage for a smooth, durable finish and avoid expensive fixes later.
How can I tell if a crack in my concrete floor needs professional repair or if I can fix it myself?
To figure out whether a crack needs professional attention or can be handled as a DIY project, the first step is to determine what type of crack you’re dealing with. Dynamic cracks – the ones that are still shifting or expanding – often point to underlying structural problems. These typically require a professional assessment, such as from a structural engineer. In contrast, static cracks are stable and unlikely to grow, which makes them more manageable for DIY repairs.
For smaller, static cracks, products like epoxy fillers or concrete patching compounds can work well. But if there’s any doubt about how serious the crack might be or whether it could get worse, reaching out to a professional is the safest way to ensure the repair is both durable and secure.
How should I prepare a concrete floor to ensure epoxy coatings stick properly?
To get epoxy coatings to stick properly, begin by giving the concrete floor a deep clean to eliminate any dirt, grease, or debris. After that, check the surface for cracks and evaluate how serious they are. Hairline cracks usually don’t require much attention and can be coated over, but larger cracks need fixing with epoxy fillers or concrete patching compounds. Once the repairs are done, etch the surface to add a texture that helps the epoxy bond better. This preparation process is crucial for achieving a smooth, long-lasting, and professional-looking finish.